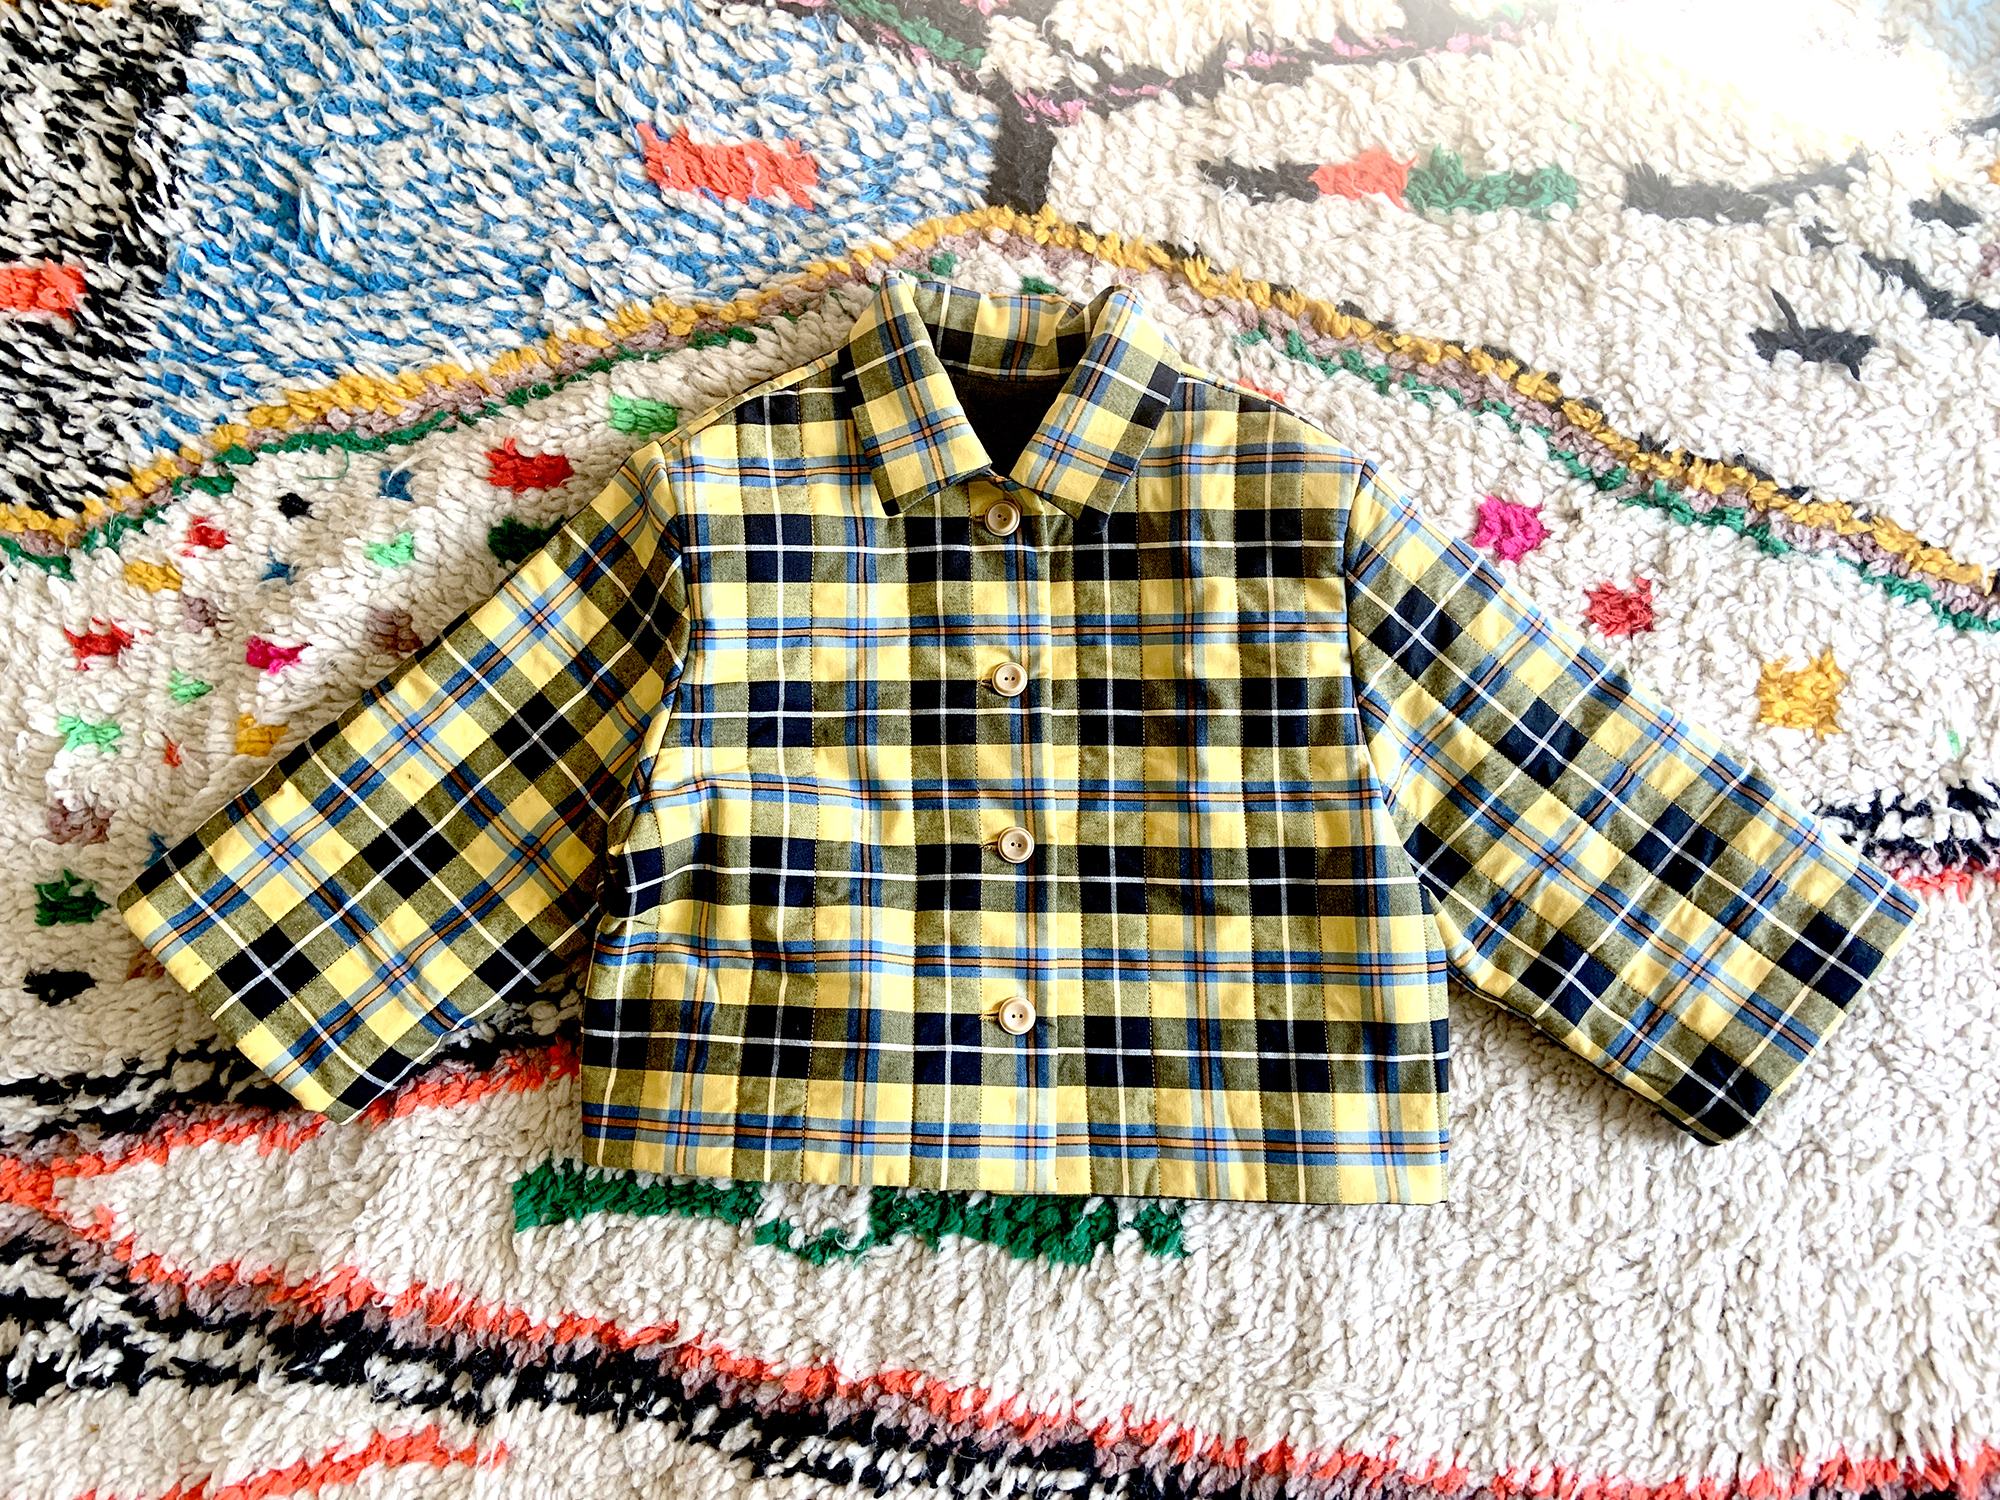
QUILTED COLLARED JACKET
When I realized that I had ~mAyBe~ just enough fabric left after the plaid Arthur Pants I knew I needed to make a matching top so that I could be head to toe yellow plaid. I roughly laid out the pieces for the Ayora Jacket that I had made once before (with some mods which Ill get to) to make sure I had enough and it seemed just possible.

Fabric: This is a Japanese Cotton Yarn Dye Twill from B + J Fabrics. Link The lining is a cotton twill that I got from Stonemountain and Daughters at the beginning of quarantine thinking I would make a dress but when I received it, it was far more drapey that I thought it would be so it was waiting for this perfect moment. I used remants of cotton batting that I zigzag stitched together to make into the larger piece.
Fit Intention: I wanted a little quilted jacket so that just the waistband of the pant would be covered and definitely a collar. To make that happen I did a bit of combining- the Ayora Jacket and the Ottoline Jacket from Merchant and Mills. I had made the Ottoline before and was delighted that I could in fact make it (first time doing a collar) but I wished, at the time, that I would have done a muslin mock because I ended up not liking the body shape. Not great photo of the Ottoline below:

Here is my version of the Ayora Jacket. For this jacket I lowered the armhole 2.5″, made the sleeve wider to accommodate the new drop, and eliminated the placket piecing. I love how it fits and the seam binding details.

To combine these patterns I had a lot to think through- the most basic of which was the seam allowance. The Ayora has 5/8″ seam allowance and the Ottoline just under 1/2″ as its actually a metric pattern. To deal with that I just tried to remember as I sewed what part of the pattern came from which original pattern. For example, the new neckline was from Ottoline so I remembered to use 1/2″. At the outset that challenge seemed like it would be really complex but as I worked through it ended up being easy to keep track of.

Adjustments: First I traced off the Ayora Jacket body (I believe I started with the size 42). I had already lowered the armhole 2.5″ which I loved so I kept that. Then I traced in the Ottoline neckline (size 12) . I had to finesse the back a bit because the Ottoline back neck required extending the back panel about 1/2″- I’m not totally sure why but I suspect that the back width is maybe part of what I do not like about the original. Next time I would find a way to narrow the back to the orginal Ayora width. Then I realized that I should have a facing at the center front which required me to make the bottom front completely straight // right angle instead of curved like the Ayora. I also made up the facing pattern- see the next image.
I left the sleeves exactly as my Ayora mod.
The collar I split into 2 pieces by tracing off half and then adding 1/2″ to the straight top part of the collar.

Construction: Since this is a quilted jacket the first thing I did was cut out my body pieces a little larger than needed because they shrink a bit when quilted. (self, batting, lining) I did a test first to make sure I like the quilting. I used a slightly longer stitch – 2.6mm and yellow top thread + black bobbin thread. I used a walking foot when I made the Ayora but I didnt know about presser foot pressure- this time I upped the pressure and it helped the walking foot actually walk!

Once the body was quilted I cut out the pattern pieces to the main body (which is quilted) and the facing which is one layer of self fabric. I stitched the facing right sides together up the center front and the first little bit of the collar- then turned it back. I hand stitched the facing to the inside after trimming some of the bulk of the seam – especially the batting- back.
Next I stitched the shoulder seams right sides together and put a little binding over the edge. I love a clean finish on the inside. I think that comes from not being great with the serger….yet. Then I added the collar which is the best part because it feels real. I think it was then that I took a little dance break because it felt like an achievement- the rest would come together easily. Vengabus by the Venga Boys came on the radio and it reminded me of listening to the radio as a teenager and hearing the radio DJs advertise a local club night. Venga Boys were always the hype song…lol.

This is the part where I realized that I did not have enough fabric for full sleeves- that was not going to stop me though so I just plowed ahead and quilted the shorter sleeves. I believe these sleeves are about 5″ shorter than the original pattern.
Finishing: to finish this jacket, no surprise, I made a bunch of facings. The bottom has a 2″ plaid facing and the sleeve has the lining fabric as a facing. My lining fabric was quite shifty and sort of slinky making it a little difficult to work with but I love the look. One blessing of the slinky lining is that when I made my strips to bind the armholes I felt that I actually could cut the strips on the straight grain instead of the bias. So my binding is not on the bias but worked just fine.

Buttonholes are one of my favorite finishing steps because, again, I love a hand sewn detail. I like to use Victorian style button holes. Here is a tutorial to how to make them. Is that a Transatlantic accent I hear? Or maybe she’s just a historian using a historian accent, not sure. Either way I always use that buttonhole technique.

and thats it! complete.
Reflections: My number one reflection on this pattern mash up is that I extended the back pattern a little based on the original Ottoline pattern but it made the back gape a bit at the bottom. I would have liked a little-more-fitted-back-bodice but instead its bell shaped. Im fine with it, just if it make it again, I’d eliminate or add darts.